|
PowerISO not only supports burning image file, but also
supports on-the-fly burning. With PowerISO, you can backup files and folders to
compact disc. To Burn data disc with PowerISO, please follow the
steps,
-
Run PowerISO.
-
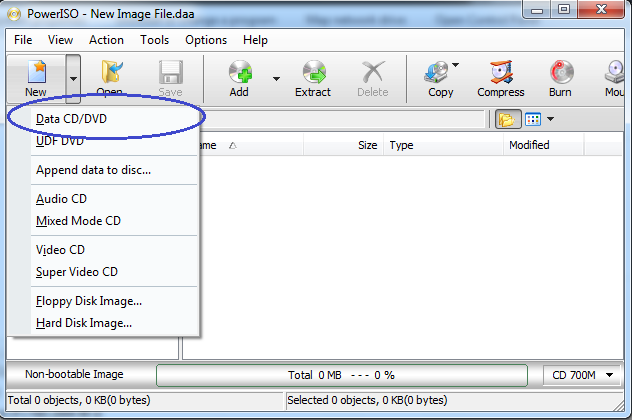
Click on the "New" button on toolbar, then choose "Data CD / DVD" from the popup menu. This will create an empty
compilation. If you want to create a UDF DVD disc, please choose
"UDF DVD" from the popup menu.
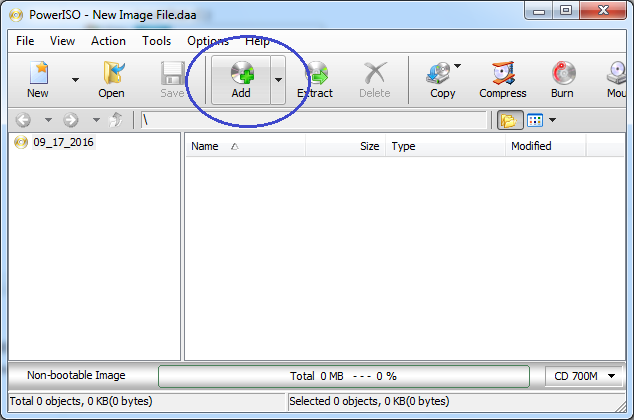
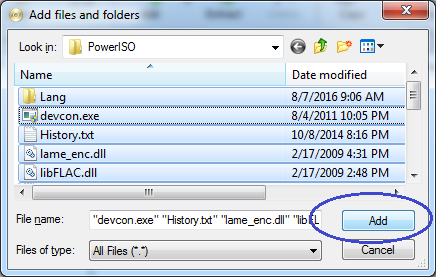
You can directly drag files and folders from
Windows Explorer to the PowerISO window. CTRL-C and CTRL-V can also be
used to add files to current compilation.
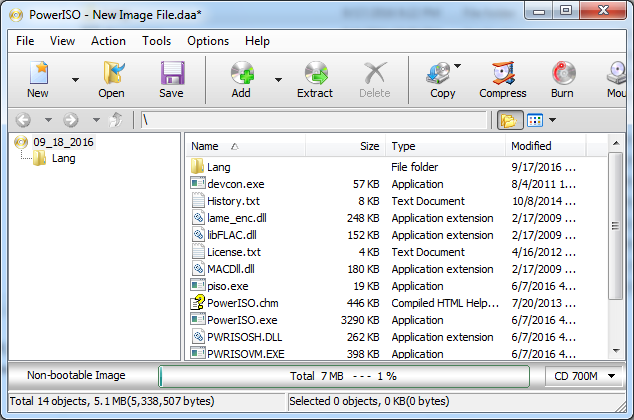
You can also edit the current compilation as follows,
* Choose the menu "Action > New Folder" to
create a new empty folder under current folder.
* Choose the menu "Action > Change Label"
to change the default label.
* Choose the menu "File > Properties" to set
the the properties for current compilation. If you are not sure what it
is, simply keep this settings unchanged.
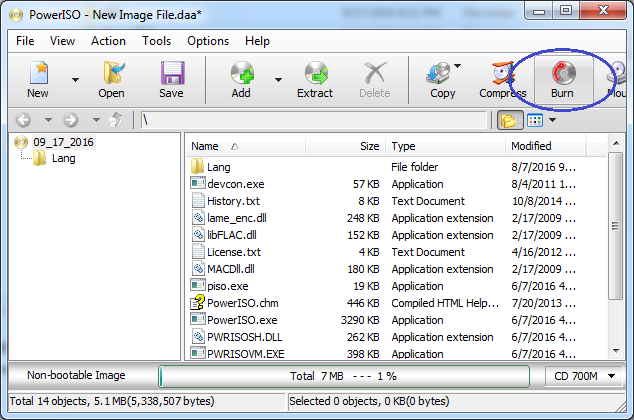
-
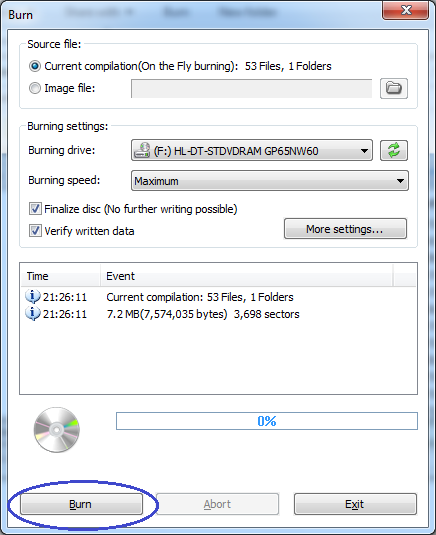
PowerISO will show the burning dialog. Please select the
proper burning drive from the list, and change other settings if
necessary. If you want to append data to the disc in the future, please do
not check the option, "Finalize disc".
-
Click "Burn" button to start burning current
compilation to the disc. If the "Verify written data" option is
checked, PowerISO will verify written data to make sure the data written
to the disc can be read back, and is identical with the original copy.
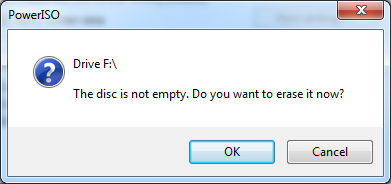
If the destination disc is rewritable, and is not empty,
PowerISO will show a dialog prompts you to erase it before burning. Please
press "OK" to confirm and continue.
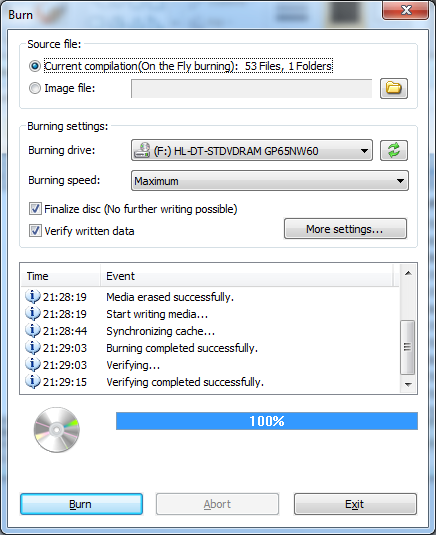
PowerISO will show the burning progress
information after burning start. If burning finished successfully,
you can get the message, "Burning completed
successfully". If "Verify written data" option is
checked, and data verifying is OK, you will also get the message
finally, "Verifying completed successfully.".
Related Topics:
Burn ISO File
Create ISO File
Burning Settings
|


