|
PowerISO can not only burn ISO file to CD / DVD disc, but also
burn it to an USB drive, thus to create bootable USB drive. You can then boot
computer from the USB drive to setup Windows, Linux, or run a live operating
system from the USB drive. PowerISO supports burning ISO file to
USB drive in BIOS OR UEFI mode, thus can provide best compatibility for most
of computers.
To burn or write an ISO file to USB drive, please follow the steps,
-
Start PowerISO (v8.7 or newer version, download here).
-
Connect the USB drive to the computer.
-
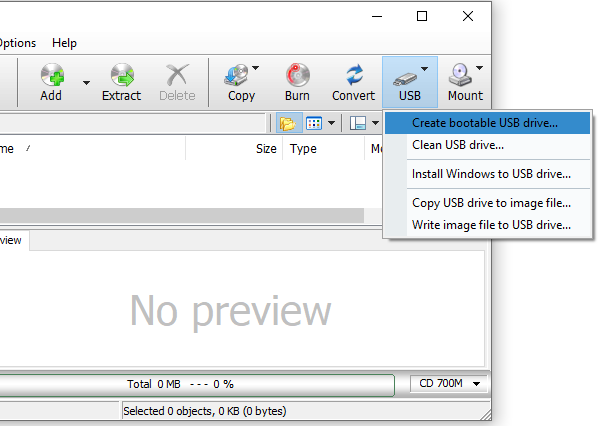
Click on "USB" toolbar button and select
"Create bootable USB drive..." from the popup menu. You can also
do it by clicking the menu, "Tools --> USB tools --> Create
bootable USB drive...".
-
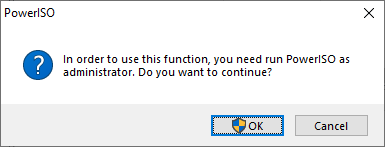
System administrative privilege is required to
write USB drive. Please confirm the UAC dialog to continue.
-
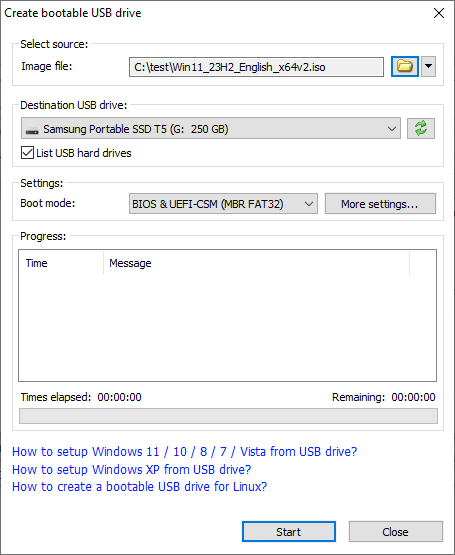
The "Create bootable USB drive" dialog shows.
Click browse button to select the iso file. PowerISO can
write ISO files and other popular image files to USB drive, such as nrg, daa,
bin / cue, dmg, and etc. You can also select compressed image files, such as
gz, bz2, xz, and lzma files.
Select the correct USB drive from the "Destination USB
Drive" list. If
your USB drive is not listed, please check the option, "List USB hard
drives".
Choose the proper boot mode. For most of modern computers,
UEFI mode is
recommended. For old computers which doesn't support UEFI, or you have
enabled CSM support in BIOS settings, you can also select BIOS as the boot
mode.
Click "Start" button to start writing ISO file
to USB drive.
-
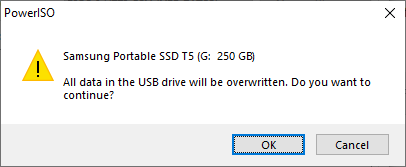
PowerISO will alert you that all data on USB drive will be
destroyed. Please make sure that you have selected the correct USB drive,
and backed up the important files in
the drive before clicking OK.
-
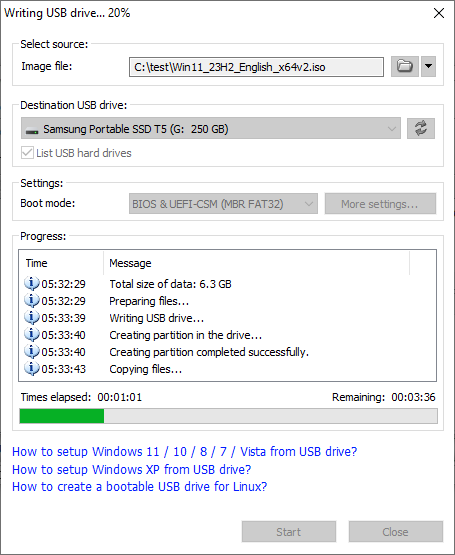
The program will start writing selected ISO file USB drive. The progress
information will be shown when writing. PowerISO will erase all partitions in the USB drive, create and
format new partitions, then write files and boot information to the USB
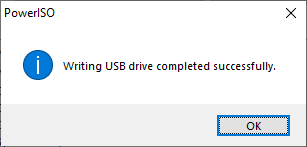
drive. You should get the message "Writing USB drive completed
successfully." after the process completes.
-
Reboot the computer and configure BIOS to boot from USB
drive. Usually you can enter the BIOS configuration screen by hitting F1, F2,
Delete or Escape while booting. The instruction may also show on the screen on
boot. For most of modern computers, it is suggested to select UEFI mode for
booting. If the ISO file is written in "BIOS & UEFI-CSM"
or "BIOS" method, please enable the CSM support in BIOS
settings.
-
Save and exit BIOS configuration. The computer should boot
from the USB drive if no problem occurs. You can then setup operating system or run
Live operating system from the USB drive.
|


