Home

Download

Buy Now

Tutorials

Contact US

How to use PowerISO as ISO Creator?

You are here:  Tutorials > How to use PowerISO as ISO Creator?


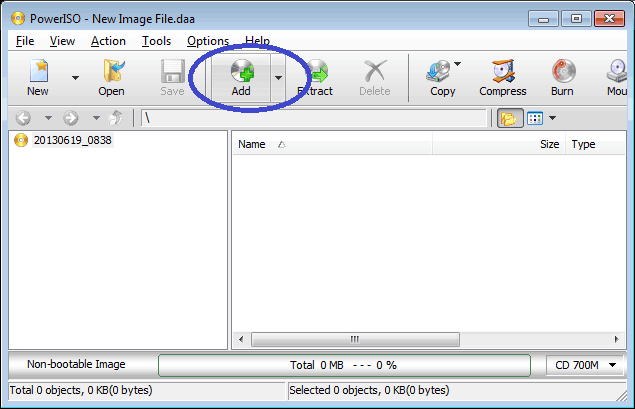
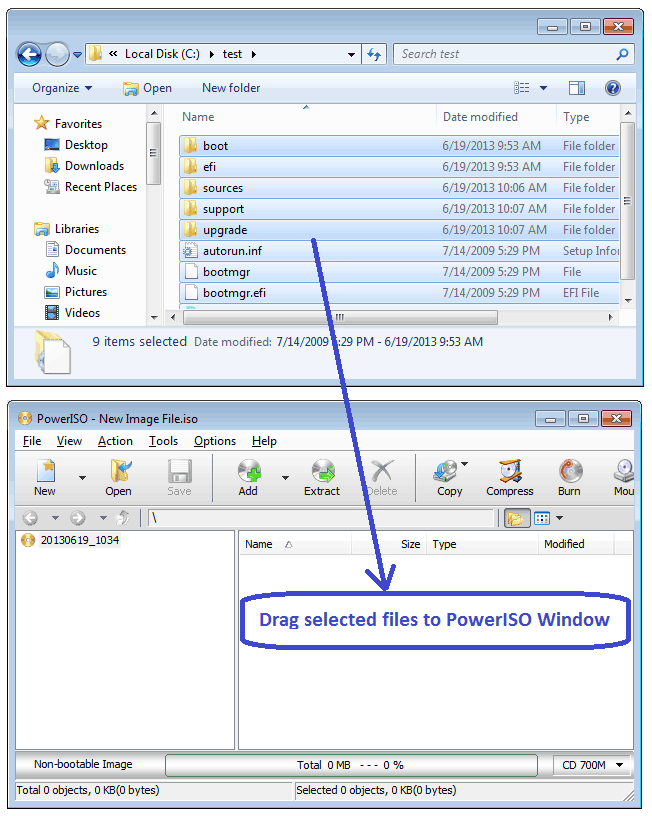
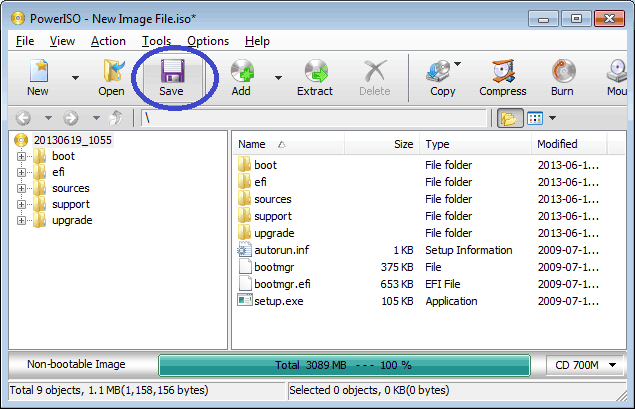
PowerISO can create ISO from files and folders in the hard disc. There are three ways to launch the iso creator, using the main program, using the shell context menu, or using the drag-and drop. With PowerISO, You can create ISO file with a single click!

Usage1: Create ISO file using the main program:

  • Run PowerISO.

  • Click the "Add" button on toolbar to add files and folders. You can also directly drag files and folders from Windows Explorer to PowerISO window. 

Another method to add files is using the system clipboard. You can select files and folders in Windows Explorer, hit "CTRL-C" to copy them to clipboard, then go to PowerISO window, and hit "CTRL-V" to paste selected files and folders to current compilation. 

  • Choose the menu "Action > New Folder" to create a new folder.

  • Choose the menu "Action > Change Label" to change the default label.

  • Choose the menu "File > Properties" to set the iso file properties.

  • After you have added all files and folders and made all necessary changes, click the "Save" button on toolbar, or choose the "File > Save" menu to save the iso file.


Usage2: Create ISO file using the shell context menu:

  • Open "My Computer" and select the files and folders which you want to add to iso file.

  • Right-click on the files selected, the shell context menu will popup.

  • Choose the menu "Add to xxxxx.iso".

  • PowerISO main program will start to run. It will automatically add all files and folders selected to the current compilation, then save the iso file with the specified name.

(Notes: The default image type for saving is DAA, you can change it to ISO format in PowerISO configuration dialog.)

Usage3: Create ISO file using the drag and drop:

  • Run PowerISO.

  • Open "My Computer" and select the files which you want to add to iso file.

  • Drag all files and folders selected to the PowerISO window.

(Notes: You can also add files and folders using system clipboard.)

  • Click the "Save" button to save the iso file..


Copyright 2004-2024 Power Software Ltd. All rights reserved.